Sunday, 23 April 2017

Who dares, wins. And I always win!

Who dares, wins. And I always win!

Between monte Tamaro (1962 masl) and monte Lema (1621 masl), in Ticino, there is a very famous path that goes along the crest between the Malcantone and the valle Veddasca. Half way of this path, there is the monte Gradiccioli (1935 masl), which can either be climbed or walked on the side. I tried 2 years ago to climb it with the trial motorbike, but it is very steep and rocky and moreover you are on a crest of the mountain, so a mistake can lead to fatal consequences.

After the traditional launch of Easter, it was such a beautiful day that I decided that it was the right day for try the challange. The weather was amazing, warm and very clear, so the views from up there would have been amazing. At 5 o'clock I was back home and I started getting ready. On the way back home I realized that the wind was increasing and that the insects where flying very low, so the first thing that I've done at home, was checking the weather forecast. Bad news, in 1 hour big raining clouds would have come down from north. I didn't care, I had already accepted the challange.

I got the bike ready, I pumped the tyres at 1 bar because I would have reached the bottom of the mountain by roads and easy paths.

I went up the Valle della Magliasina till the deviation for the Val Agario, where the challange was starting:

I let the air flowing out of the tyres to the right pressure and I started the climb. I had already ridden on this path but I was not remembering it at all: it was full of leaves on the ground and the path was always on the side of very steep slopes. Dangereous but not difficult.

The wind speed increased more, now it was already around 6 o'clock, so the rain was coming.

I've reached alpe Nisciora and I've followed the side of the Gradiccioli till Alpe Agario, where I went up to the crest of the Tamaro-Lema. There is an old military construction over there where there is the possibility to get some food and drinks (Yes, even beer!). I had a tea and I relaxed myself because I was on the crest and I could see very well that no clouds were coming...no rain!

Kind of sad because near Cannobio, in Italy, there was a fire and there were some helicopters going on and back throwing water on the fire.

The crest of the Tamaro-Lema, amazing colors. On the back you can see the summit of the Gradiccioli

Then I reached the intersection (around 1730 masl) or climbing the Gradiccioli or passing by the side. I went up, of course. I was believing on myself, I wanted to reach the summit at any cost.

I started riding on the crest which was alway getting smaller and steeper, on the path there were more rocks than dirt, even big ones which required some balance and full throttle for climbing them.

I've reached the point where I had given up 2 years ago. A pictures was a must:

On the back you can see the smoke of the fire.
 Going by the side was impossible as the there is no grip on grass and actually it is very dangerous, because falling it means sliding down a lot of meters before being able to stop.

But this time I went on, I kept riding, in some points I had to go by the side of the bike because I was really afraid of falling. Then after climbing some rocky parts, I reached this point and I realized that the challange would have been completed:


Reached the summit, the bike was very happy and I was feeling invincible. A couple of Braaaps for commemorating the achievement. Blue smoke on the top of Gradiccioli for the first time ever.


The wind was very strong up there, I had bought a beer for celebrating the moment, but I decided to first going back down to the military building in order to still have 101% control of my skills.

On the crest Tamaro-Lema I celebrated my achievement by wheeling the bike while an helicopter was passing up on my side.

Kind of this feeling:


Differents bikes and different speeds, of course.

It has been a short and nice ride and I'm impressed on how my riding skills improved in the last two years. Stay tuned for more soon!


Saturday, 14 January 2017

Suspensions

Working on suspensions is the first thing you have to do if you want to have a better motorbike. No discussion on this, there is no increase in power that can improve as much as a well tuned fork.

A lot of XRV owners replace the suspensions of the bike with USD forks and fency gold colored rear shocks.  This is a very expensive solution and I don't like it.

Boano sells this kit for the XRV series. Around 2000 €.

It is for sure a good improvement, but it is really to expensive in my opinion.
Moreover this kit leads to a problem: as these replacement forks are more stiff, the bearing of the front wheel are more stressed and they need to be changed a lot more often. On forums a lot of people with these forks say that they always have spare wheel bearings with them even for small raids in Marocco.
I've never changed any of these bearings in more than 26000 km.

The original forks of the XRV 650 are very nice in my opinion, because they allow the user to tune them properly and, as they are not so stiff, it is easier to ride the bike.

Here you can find everything you need to know about the XRV 650 suspensions:
http://www.xrv650.eu/do-it-yourself/modifications/suspension-upgrading


In the front forks I have fit Wirth springs and I'm fine with them.
The sag with me on the bike was to high, so I've placed some sheems between caps and springs in order to increase the preload.
Fork caps and shems increasing the preload (Total thickness is 7,5 mm).

I'm very happy with this set up of the bike.
The fork oil should be changed every 20000 km or less if you are riding a lot off road. I've changed mine after 26000 km with a lot offroad.

Fork oil after 26000 km, it looks like engine oil.

You don't realize that the forks change the behaviour because it is a slow process. When you renew them, you really feel the difference.

The rear shock of the XRV 650 is the best compromise between performance and longevity: don't change it if you want to use the bike for riding all around the world!

It can be renewed and I really suggest everybody to change the spring, unless you weight 70 kg with the full riding equipment on you. The hyperpro one it is said it is the best one. But as I'm taller and bigger than most of the people, I went for a spring with 140 N/mm spring rate: before the trip to Caucasus I had no time to wait for the spring and to renew the shock, so I changed it with a Hagon one with a 140 N/mm spring rate. 
It did its job well despite it had no external tank but in Igoumenitsa, after more than 20000 km, it started leaking oil.

Tune the suspensions of your bike in order to create a better relationship between you and it.
Don't forget to talk to it from time to time!


Tuesday, 10 January 2017

New look and first test

The 31st of December I've finally got the fairing from perfect-fairings (order placed the 18th of November). No worries, but it is good to know.

The fairing is well made, not made by cheap thing fiberglass and moreover the use mesh fiberglass, so it is very tough.

I asked them make it blank, because I wanted to use it with the big "swiss" square light, so I would have to cut out the hole for the light by myself. Not a big deal.

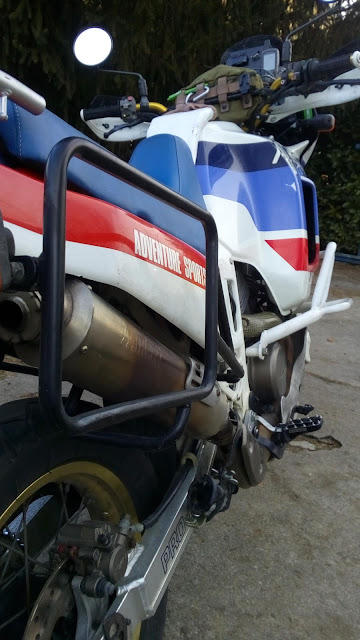
 Race-ready XRV 650

 The fairing with supports and the hole for the light.


The things that disappointed me, is that the fairing didn't have the 4 thread for fixing it at the light frame. So I had to build some support by meslf.

Moreover, the fairing is a bit  longer (around 3) cm than the standard one. I noticed this when I had already done the 4 supports for it, so I kept it like this.

I've made a instruments panel out of plexiglass with a laser cutter.

Placing the plexiglass intrumental panel.

After painting the fairing with the original scheme (Not standard color sadly), refinishing the internal of the fairing with matt black and putting everything at its place, here it is the bike:

Almost ready for everything.

I still have to put a 2 mm plexiglass protection on the light.

 The very rare Arrow Paris Dakar.

 The instrumental panel. The GPS support is mounted on silent blocks.
I still have to move the clock.

I've also cut a thin foam for the air intake and I've placed a PA sock at the entrance, so that it is a very efficient prefilter and it can really be cleaned easily . In fact it is possible to move the sock a little bit in order to have it clean at the intake: so cleaning the sock it is not necessary to clean it often!
I've also removed the part of the air intake under the tank's cap because it was not necessary at all for fixing the air intake.

PA sock athe the air intake.

I went for a 300 km ride, up to 1600 meters over the sea level with temperatures from -7° C up to 5° C. A very nice day with no traffic on the roads. The air intake proved to be good and the jetting of the bike is more or less fine. Let's see when the weather will be hotter, but I don't feel like it will be necessary to modify anything.
An issue of the upper air intake is the following: At high speeds (More than 80 kilometers per hour) standing in front during the ride modifies the pressure at the air intake, so more air pass through it and the engine runs lean.
It is not a big issues, since this happens only when I stand with straight legs, this happens only when I've been riding for many kilometers and I want to stretch myself. When I ride offroad legs are never straight, so I'm more leaned back and there is no issue

In Ponte Tresa around 9 o'clock.

A detailed report of the ride can be found here:
http://motoalpinismo.it/smf/index.php?topic=14859.msg167945#new

Thanks to Bikerider for riding with me!


Wednesday, 4 January 2017

Reinforced bashplate

The XRV 650 is a very protective piece of alluminium: It covers the whole engine and even both side very well.

But between the bashplate and the engine there is an air gap, this means that in case of a big it, the bashplate can deform or break and the engine can take diretly an hard hit.
This doesn't happen on trial motorbikes, because between the skid plate and the engine there is a hard rubber.

Rubber between skid plate and engine on a Gas GAs TXT.

This could be a solution for spreading the force of an impact, the best improvement for the XRV 650 bash plate, but the rubber has to be shaped with the shape of the engine, this is a difficult operation without removing the engine. Moreover the shape of the skid plate itself it is not studied for taking big hits with hard object (i.e.: Hitting a rock or holding the whole weight of bike and pilot).

So I decided to not follow this solution.

Some producers as Boano or Africaqueens have different skid plates, they are not very expensive (200-400 €), and have some improvements (Boano sells a skid plate with pouches on the side for olding tools & general stuff).
These solutions are anyway out of my budget.

A good improvement of the skid plate, is to make it stiffer by increasing the alluminium thickness or by adding some composite material, as fiberglass or carbon-kevlar.

I decided to follow this solution because it is very easy and can be cheap.
With less than 35 € you can buy fiberglass and resin. There are two type of fiberglass, with an ordered mesh fibers or without mesh. The first one costs more but it offers more tensile strength (Along fibers), the second one is cheaper and has less tensile strenght as the fibers are shorter.

I've used the fiberglass without mesh as it is cheaper and there are no mechanical requirements for my application (layer of mesh kevlar would have been nice for improving the resistace to impacts, but I think the one of the fiberglass will be enough...big hits will show results!)

Easy work, clean the bashplate, pass some rough 60 sand paper on the lower part and on the low sides and inside if you are planning to close the oil drain hole. Then cut pieces fiberglass as big as possible in order to match the surface of the skid plate, in order to make 2 or 3 layers.
Then...just follow a tutorial on how to make composite fiberglass.
Easy peasy.
When the composite was completely dry, I've put 8 rivets on the bash plate, in order to ensure that the fiberglass will always be connected to the alluminium bashplate...in case the resin will detach from the alluminium.

At the end I've passed some epoxy plaster on the border in order to make them look smother.

 The reinforced bash plate.

Detail of the closed oil drain hole, filled with stucco for making it look smoother.


UPDATE 25.05.2017

I've been riding the XRV on offroad for a couple of kilometers, from some easy gravel roads to some very hard and muddy muletracks on the Linea Cadorna, a WWI defensive trenchs system in Italy on the border with Switzerland. The bashplate took some its, so at the oil/filter change, I had to remove it and I could see that it is in perfect shape. The fiberglass is sticking perfectly to the alluminium.


Sunday, 1 January 2017

Repairing an oil leak

On the road up to Rikavacko lake, in Montenegro, I've ridden on a big flat rock, which  flipped over and blocked between the the bash plate and the ground. It was a big hit and I almost felt.

The bash plate has a triangular opening for changing the oil, which make the bashplate itself weaker. I wanted to weld it or to put some fiberglass on it before starting the trip, but I though it was not so necessary...

I realized immediately that the engine itself was hitted by the rock, a piece of the carter near the oil drain plug was broken. Nothing bad, the bike was not leaking oil. After the whole trip, when I've removed the bash plate for cleaning the bike I realized that there was some oil on it. At the beginning I thought it might have been some oil that remained on the carter after the oil change in Thessaloniki, but after a trip to Zurich, I realized that there was an oil leak.

No worries it was a very small leak, just few droplets per week.

So in order to repair it had to drain the engine oil first. Then I've cleaned the region of the carter where the oil was coming out.

On the red circle you can see a part of the carter that has been deformed by the hit with the rock.
On the red square there is the small missing part of the carter, nothing import.

I've passed a rough 60 sand paper on the area, cleaned it with brake cleaner (because it has pressure and it was easier to clean upside-down) and blown the whole regione with air pressure.

After this, the carter was ready for receiving the 2 components epoxy made by Kent. It is very expensive but it is extremely good: I've repaired a lot of different things with it, an air intake of a RGV250 carburettor aswell for example. It was time to be a Bastler and so I did my job:

Engineering at its finest.

It holds very well and it will last forever. It will make for sure difficult to separate the two carters, but I don't think I will every open them. Next post will be about the reinforced bash plate.

Tuesday, 27 December 2016

Improving the air intake system of the XRV 650

A really bad point of the XRV 650 is the air intake: It is very low and closed to the rear tyre and as it is impossible to obtain a perfect sealed system between the rileft fairing, the rear mudguard and the frame, dust and mud will always easily reach the air intake and the filter will get dirt easily.

I knew that before buying the motorbike. The original air filter is the best one for the motorbike (regarding filtering and jetting), but sadly it cannot be washed because it is made of paper, the only way is to use air pressure from the inside toward the outside. The exhaust system can be used for this, but it is not as effective as an air compressor gun (anyway the filter won't be new).
A washable K&N filter can be used, but it is not filtering as good as the original one (The engine runs a little bit leaner with K&N filter), so I didn't wanted to use it, because right now my engine is eating 0,5 liter of oil every 10'000 km, which is nothing.
During the trip I used a filter skin, which allows less dirt to reach the filter (the filter skin was a woman PA collant), but it was making the engine running richer.

So I started gathering informations because I wanted to find a solution to this problem, so that the XRV 650 would have been the perfect bike for travelling.

I've look on the internet and I've found that the RD04 Marathon had an air intake of the tank.
XRV 750 RD04 Marathon with air intake over the tank and longer air filter.
( http://www.nightwings.org/Marathon/Marathon-750.htm )

I've written to the owner of the website for gathering more informations after seeing this picture of a German guy that was building a Marathon replica:

Tim's marathon replica. Work still in progress?

He answered me very fastly and he sent me two more picture of the snorkel itself.


Tim's marathon replica. Work still in progress?

Very nice snorkel, but I don't like the fact that is made of aluminium, fiberglass would have been cheaper and more lightweight!

Roberto Boano was a pilot that raced the Dakar many times with XRV Marathon series, including a RD04. Right now he is realizing special parts for a lot of Honda Twins bikes and many other models. ( http://boano.com/ ). He has special parts for the XRV 650 such as the bigger marathon style tank and the marathon style rear tank (including the shorter seat with place for the transponder). No clue about the air intake over the tank. So I wrote him an e-mail. He answered me very quickly, but sadly he is just making this modification for marathon bikes, this means:
  • *Modify the original airbox for the new air intake and for allowing the use of longer air filter
  • *Upper air intake / snorkel
  • New seat 
  • Longer air filter
  • Front bigger tank
  • Modify the left rear fairing
  • New jetting
All together it is costing around 2000 € + VAT (22%!), I've marked with a * the modification that are relevant for me, but they are costing 650 € + VAT, so it was to much for me. He suggested me to use a longer foam air filter with a reduction after it, in order to use the original jetting but having a bigger filtrating surface, would have reduced the maintenance intervals and moreover the foam airfilter is washable. But this was not a good solution for me, because he told me that it has to be cleaned after every day ride if in dusty riding conditions.

Meanwhile I had opened a Thread on the Italian Africatwin club:

and on the xrv community:

I don't like forums, because they are always full "famous" people that are like a God on the forum, and whatever they say, it is true. It happened on the Italian one, I was told it is impossible to modify the air intake of the XRV 650 without changing the jetting, and a lot of people tried to take the air from the front of the bike or more under the seat with a longer air intake, but the bike was running rich after these tries (Of course, if you increase the length of the air intake, you increase its resistance and so "less" air gets into the airbox). But anyway forums are very good for gathering informations.
A guy on the Italian forum did an amazing modification: He adapted the RD07 air filter to the RD03, he had to cut the original tank  (after the work the bike had around 17 liters of fuel). Nice work, that could be a very good solution, moreover the place for the air conduct under the tank could have been used for holding more fuel and the same for the place where the original airbox was, so that the fuel quantity of the bike was still the same.
But sadly I can't weld, so it was a no go for me, but I think that this solution is way much better than the snorkel, has it lowers the center of gravity of the bike too.

I've written to Africanqueens.de as well, because they have something about a modified air intake for the RD03 in their onlineshop , but they've never replied me back.

So I decided to do everything by myself. I'd like to thank Simone Gervasoni for the hints on how to do the snorkel. I've done some rough calculations of the original air intake snorkel, in order to have a rough dimension for the cross section of the one over the tank. I ended up having a 120 x 20 mm^2 cross section in order to have a lower air resistance, so that I would have been able to compensate it by inserting a low density foam in the snorkel.

So I've started building it. I did directly the mold on the tank, I covered it with 2 layers of cellophan because Simone told me that almost nothing sticks to it, that's true. The first error was that the resin slightly diffuse through cellophan, so a little bit reached the tank and the resin gest warm during the chemical solidifcation process, this damaged the original decals on the tank. Not a big deal for me. In order to form the snorkel, I've used PEEK foam covered with cellophan.
 Ready for closing the snorkel.

 Waiting for the fiber to solidifcate.
The top part is done. 

Meanwhile I've modified the airbox, I had to build an internal separation and close the original air intake. The following image was drawn by a user on the Italian Africa twin club forum. Many thanks again mate!

How the original airbox has to be modified for the higher air intake.

Almost finished snorkel. 

There were some leaks on the snorkel as fiberglass is not 100% sealed. But I decided to try it in order to see if the bike was lean. That was the case, so I decided to finish it.

I used some fiberglass refinish and then and to build the small border in order to seal the snorkel on the airbox (I've putted some neoprene on the airbox in order to ensure a perfect sealed system).

The connection between the snorke and the airbox.

Then I've painted the snorkel and  I had a test ride in order to determin the length of the foam. I started with a 150 mm long foam and at the end I had the perfect jetting with a 20 mm long piece of foam. The seat had to be modified aswell, but that was an easy job.
Next step will be trying a PA collant on the foam, in order to have a pre filtering element that can be easily washed.

The bike has been tested with K&N filter (with the new snorkel there is no risk that a lot of dust will reach it) and Arrow Paris Dakar muffler. The jetting doesn't need any adjustment yet, but I've tested the bike just with an ambient temperature of 12° C.

 The three screws have just the purpose to aboid the foam to be sucked into the snorkel.


That's all folks!


UPDATE 25.05.2017

Last week I've been able to ride the motorbike at more than 2000 meters over the sea level: jetting is fine as it was before the modification. At some rpm there are some small fluctuactions of power, probably due to a formation of turbulences into the channel: there is no internal smooth layer, so it is very rough, with spots of fiberglass obstructing it. But the motorbike can be ridden very well anyway in any condition so far (from mud muletracks in first gear to very high mountain pass in fifth gear at 100 km/h).


UPDATE 12.07.2017

I was able to ride in some very hard conditions like deep water, tough mud and higher altitudes (Almost up to 3000 masl). The beast never had a problem. When I removed the left hand rear side cover it was clear that the filter would have suffered a lot from mud as the plate closing the original air intake was still completely covered in mud.


Then after around 10000 km of test, I've removed the seat and the air intake. Everything is still in perfect shape. This is really a modification that I suggest to do if you want to ride the world with an XRV 650.


Saturday, 24 September 2016

Back to school, day 43, around 15000 km, Bedigliora in Switzerland

That's it. The journey is over. It is time to go back to the normal life and to worry about all the silly things. I'm changed for sure: Now I really know what I want from my life, this is amazing but it doesn't mean I know everything! All was almost perfect, there is nothing I have to regret and I'm just looking forward what's next. I want to thank all the kind people that helped me organazing this trip and all the wounderful persons I've met during it. Stay tuned, because the future will bring even more serious stuff!

TT4 in Montenegro

TT4 near Rikavacko lake.

Direction Žabljak.

Dinaric Alps

Passo Baremone.